Creating a DIY dirndl dress is a rewarding experience that allows you to craft a stunning Bavarian outfit tailored to your unique style. With careful planning, the right materials, and a step-by-step approach, you can design a beautifully customized dirndl that is not only cost-effective but also a true reflection of your craftsmanship.
Materials and Tools You Need
Before beginning, gather all necessary supplies for a smooth and efficient sewing process.
- Fabric: Choose breathable cotton for ease of sewing or opt for luxurious velvet or silk for a formal dirndl.
- Pattern: Purchase a traditional dirndl pattern (Burda offers excellent options) or draft your own based on your measurements.
- Sewing Supplies: Sewing machine, fabric scissors, pins, measuring tape, and thread matching your fabric.
- Additional Items: Interfacing for structure, a zipper or buttons for closure, elastic for fitted designs, and decorative ribbons or lace.
Cut and Prepare Fabric
Proper fabric preparation ensures a professional finish.
- Wash and iron the fabric to pre-shrink it and remove any creases.
- Lay out your fabric on a flat surface and pin the pattern pieces securely.
- Trace the pattern onto the fabric using chalk or a removable fabric marker.
- Cut out the pattern pieces carefully, keeping the seam allowances in mind.
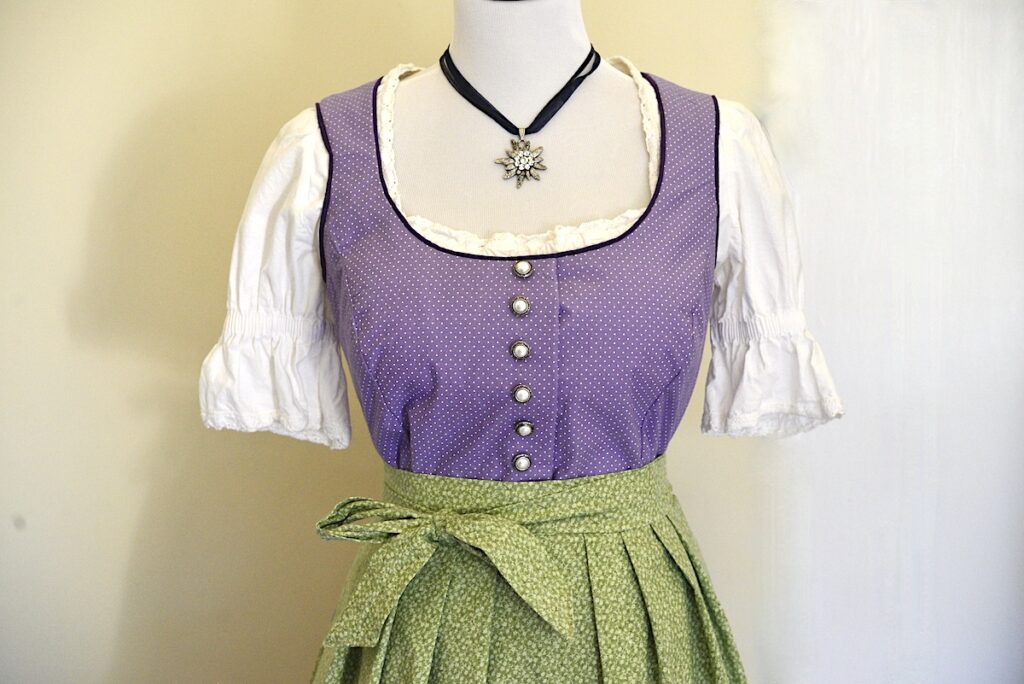
Sew the Dirndl Blouse
The blouse is a key element, typically featuring puffed sleeves and a sweetheart neckline.
- Sew darts (if included in the pattern) to shape the front and back pieces.
- Join the front and back pieces by sewing the shoulder seams.
- Gather the sleeve edges using long stitches and attach them to the armholes.
- Finish the neckline with bias tape or an elastic casing.
- Hem the sleeves and blouse bottom for a clean finish.
Construct a Fitted Bodice
A well-constructed bodice enhances the dirndl’s traditional silhouette.
- Pin and sew the bodice side seams with right sides facing.
- Sew darts to shape the bodice for a flattering fit.
- Attach piping to edges if desired for decorative detail.
- Join the front and back bodice pieces with neat stitching.
- Insert the zipper or buttons at the back, ensuring proper alignment.
- Press all seams for a crisp, polished look.
Attach a Full Dirndl Skirt
A dirndl skirt is usually gathered or pleated to create volume.
- Hem the bottom edge by folding under and stitching securely.
- Gather the top edge by sewing two long stitches and gently pulling the threads.
- Pin the gathered skirt to the bodice, distributing fullness evenly.
- Sew the skirt to the bodice securely with reinforced stitches.
- Press the waistline seam for a smooth transition.
Design and Sew the Apron
The apron completes the traditional dirndl look, adding contrast and elegance.
- Cut a rectangular piece of fabric for the apron body (about 30 inches wide by 26 inches long).
- Hem the edges by folding and stitching.
- Attach decorative elements like lace or embroidery.
- Create a waistband by sewing a folded strip of fabric and attaching it to the apron top.
- Tie the apron around your waist, ensuring a snug and stylish fit.
Final Touches: Embellishments and Adjustments
To enhance the dirndl’s authenticity, consider these final details:
- Add decorative trims such as embroidery, lace, or contrasting ribbons.
- Incorporate a corset-style lace-up detail on the bodice for a traditional touch.
- Ensure proper fit by making necessary adjustments before finalizing.
- Give all seams and hems a final press to perfect the overall appearance.
Conclusion
By following this comprehensive guide, you can craft a beautiful DIY dirndl dress that reflects your personal style while embracing Bavarian tradition. Whether you are preparing for Oktoberfest or a themed event, your handmade dirndl will stand out with elegance and authenticity. Take pride in your craftsmanship and enjoy the compliments that come with wearing a truly unique creation!